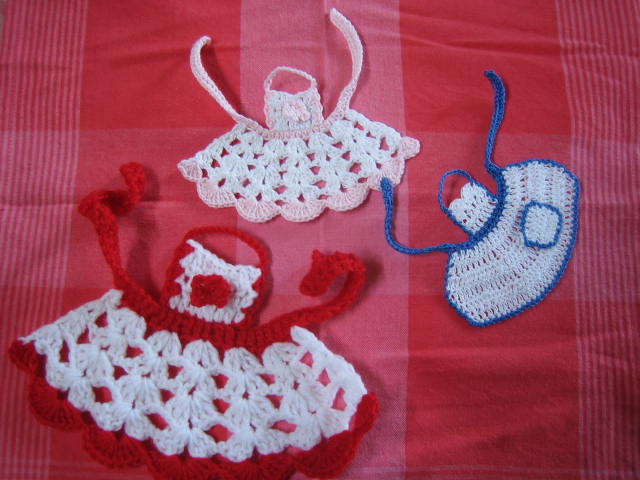
 Little Aprons
Materials
8 ply worsted weight 4mm hook makes an apron approx 12cm /5 inches from the top of the bib to the bottom of the skirt.
4ply, size 10 thread and a 2mm hook makes and apron approx 9cm /3 1/2 inches from the top of the bib to the bottom of the skirt.
Why little aprons?
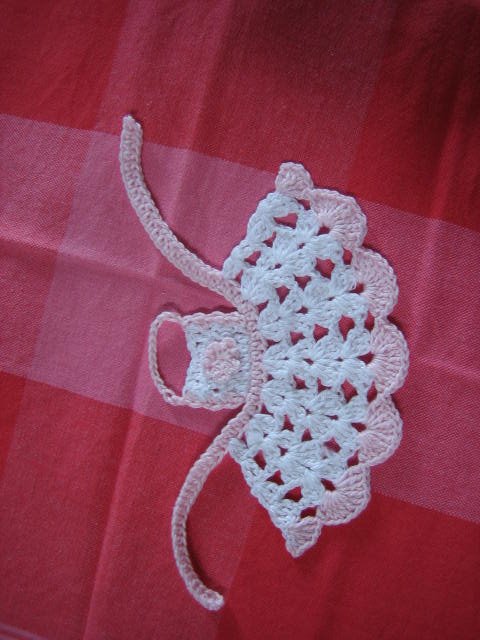
These were designed in response to a request for some Christmas ornaments of a domestic nature. They have been designed with a neck loop so as to hang on a tree. I am not an aprony sort of girl so I had fun thinking about these. They have the grandma look which is kinda cute. I can imagine Granpa coming home to a hot dinner and Grandma slaving in the kitchen in her pretty apron.
I don’t have a Barbie doll, but I did wonder whether she might look good in one? Having made these I think they might have a use for a Kitchen tea. Not sure what you would do with them, but they would look pretty on a table. It also occurred to me they might be nice with a blessing or quote attached.
“The Apron Strings were his Re-entry Vehicle”: Buzz Aldrin's wife: Every woman should control 75 to 90% of her husband's life.
There are two sets of instructions: Australian and American so make sure you use the correct ones.
Pretty Polly : Australian Instructions
 Waist tie
Make 62ch out of contrast colour. Start in 3rd ch from hook and work back along ch, make 59htr, 2ch and then 1slst finish in start ch.
Skirt
1. Miss 22st, and join main colour with a slst. Make 3ch, 1tr same sp, 1ch * miss 2, (2tr 1ch 2tr next st) 1ch. Repeat from * across 5 times, miss 2, 2tr next st (you will have 5 full shells and 2tr each end) turn at the end of each row.
2. 3ch, 1tr first st, 1ch (2tr 1ch 2tr) into 1ch at centre of each shell across, 2tr into last st.
3. 3ch, 2tr same st, 1ch * (3tr 1ch 3tr next st) 1ch. Repeat from * across 5 times, miss 2, 3tr next st.
4. 3ch, 2tr first st, 1ch (3tr 1ch 3tr) into 1ch at centre of each shell across, 3tr into last st.
5. Change colour, 3ch 4tr same sp, work 10tr into each shell across, 5tr into top of last st. finish off and weave in ends.
Bib - Turn work so as to make bib. Join main colour in the 22nd stitch from the end of the waist tie. This should correspond with the top of the 2nd shell group of the skirt.
1. 3ch, 1tr in 7st along band. These will centre over the middle 3 shells of the skirt, turn.
2. 3ch, 1tr next 7 across, turn
3. 3ch, 1tr, 1htr, 1dc, 1dc, 1htr, 1tr last 2st, finish off.
Neck tie
Join contrast at waist band at base of bib and work up side of bib - 1dc 1tr in base, 1 dc 1tr at base of next tr, twice, 1dc in top corner then make 15ch, 1dc 1tr in opposite corner of bib, 1dc 1tr at base of next tr twice, slst into the waist band. Finish off and weave in ends.
Flower - 4ch, 1dc into 1st ch made, (3ch, 1dc into first ch) 4 times = 5petals, slst finish off leaving a length of yarn to stitch flower onto bib.
Pretty Polly: American Instructions
Waist tie
Make 62ch out of contrast colour. Start in 3rd ch from hook and work back along ch, make 59hdc, 2ch and then 1slst finish in start ch.
Skirt
1. Miss 22st, and join main colour with a slst. Make 3ch, 1dc same sp, 1ch * miss 2, (2dc 1ch 2dc next st) 1ch. Repeat from * across 5 times, miss 2, 2dc next st (you will have 5 full shells and 2dc each end) turn at the end of each row.
2. 3ch, 1dc first st, 1ch (2dc 1ch 2dc) into 1ch at centre of each shell across, 2dc in last st.
3. 3ch, 2dc same st, 1ch * (3dc 1ch 3dc next st) 1ch. Repeat from * across 5 times, miss 2, 3dc next st.
4. 3ch, 2dc first st, 1ch (3dc 1ch 3dc) into 1ch at centre of each shell across, 3dc in last st.
5. Change colour, 3ch 4dc same sp, work 10dc into each shell across, 5dc into top of last st. finish off and weave in ends.
Bib - Turn work so as to make bib. Join main colour in the 22nd stitch from the end of the waist tie. This should correspond with the top of the 2nd shell group of the skirt.
1. 3ch, 1dc in 7st along band. These will centre over the middle 3 shells of the skirt, turn.
2. 3ch, 1dc next 7 across, turn
3. 3ch, 1dc, 1hdc, 1sc, 1sc, 1hdc, 1dc last 2st, finish off.
Neck tie
Join contrast at waist band at base of bib and work up side of bib – 1sc 1dc in base, 1sc 1dc at base of next dc, twice, 1sc in top corner then make 15ch, 1sc 1dc in opposite corner of bib, 1sc 1dc at base of next dc twice, slst into the waist band. Finish off and weave in ends.
Flower - 4ch, 1sc into 1st ch made, (3ch 1sc into first ch) 4 times = 5petals, slst finish off leaving a length of yarn to stitch flower onto bib.
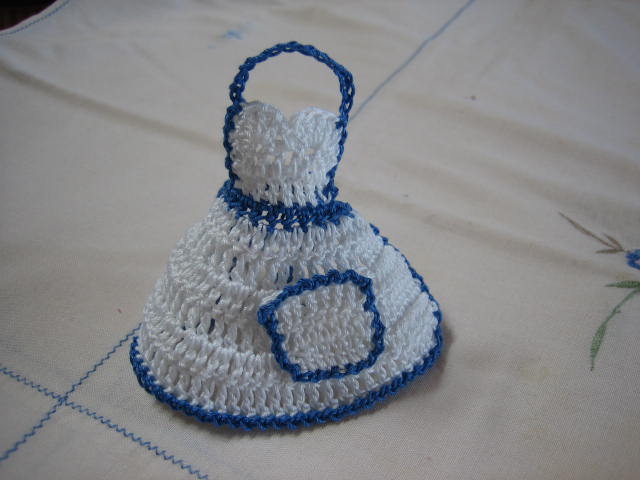
Plain Jane : Australian Instructions
 Make waist band as above.
Skirt
1. starting 22nd st from end of waist band make 3ch 1tr same st, (1tr next st, 2tr next st) 8 times across = 26 st
2. 3ch, 1tr each st across, turn
3. 3ch 1tr same st, (1tr next st, 2tr next st) 12 times across = 38 st
4. 3ch, 1tr each st across, turn
5. 3ch 1tr same st, (2tr together) 4times (1trnext st, 2tr next st) 8times, 2tr tog 5times, turn
6. 3ch, 1tr each st across = 36 finish off and weave in ends.
Join contrast at base of first st of skirt and work 1slst 1ch around edge.
Bib
Turn work so as to make bib. Join main colour in the 22nd stitch from the end of the waist tie. This should correspond with the top of the 6th group of st of the skirt.
1. 3ch, 1tr next 7st along band. These should be centred over the middle 3 shells of the skirt. Turn
2. 3ch, 1tr next 7 across, turn
3. Into 3rd st work 5tr, 1dc between 4th and 5th st, 5tr into next st, slst fin in top of last st.
Neck tie
Join contrast at waist band at base of bib and work up side of bib (1slst 1ch), 5times with final slst into 2nd tr in top corner then make 15ch, 1slst, 1ch 4th tr opposite corner shell of bib; work another (1slst 1ch) 4 times down side of bib. Finish with a slst into the waist band and weave in ends.
1. 10ch, start 2nd form hook work 1tr next 7 = 8 turn
2 & 3. 3ch, 1tr next 7 turn. Finish leaving a length of thread to sew pocket to apron.
Join contrast at corner and work 1slst 1ch evenly around edge, weave in ends. Stitch pocket to front of apron.
Plain Jane: American Instructions
Make waist band as above.
Skirt
1. starting 22nd st from end of waist band make 3ch 1dc same st, (1tr next st, 2dc next st) 8 times across = 26st
2. 3ch, 1dc each st across, turn
3. 3ch 1dc same st, (1dc next st, 2dc next st) 12 times across = 38 st
4. 3ch, 1dc each st across, turn
5. 3ch 1dc same st, (2dc together) 4times, (1dc next st, 2dc next st) 8times, 2dc tog 5times, turn
6. 3ch, 1dc each st across = 36 finish off and weave in ends.
Join contrast at base of first st of skirt and work 1slst 1ch around edge.
Bib - Turn work so as to make bib. Join main colour in the 22nd stitch from the end of the waist tie. This should correspond with the top of the 6th group of st of the skirt.
1. 3ch, 1dc next 7st along band. These should be centred over the middle 3 shells of the skirt. Turn
2. 3ch, 1dc next 7 across, turn
3. Into 3rd st work 5dc, 1sc between 4th and 5th st, 5dc into next st, slst fin in top of last st.
Neck tie
Join contrast at waist band at base of bib and work up side of bib (1slst 1ch), 5times with final slst into 2nd tr in top corner then make 15ch, 1slst, 1ch 4th dc opposite corner shell of bib; work another (1slst 1ch) 4 times down side of bib. Finish with a slst into the waist band and weave in ends.
Pocket
1. 10ch, start 2nd form hook work 1dc next 7 = 8 turn
2 & 3. 3ch, 1dc next 7 st, turn. Finish leaving a length of thread to sew pocket to apron.
Join contrast at corner and work 1slst 1ch evenly around edge, weave in ends.
Stitch pocket to front of apron.
I hope you enjoy these.
(c) crochetroo. Pattern not to be reproduced. You can makes as many of these as you want and do whatever you wish with them. Have fun!
If you do come up with some interesting uses please let me know.


 (c) crochetroo
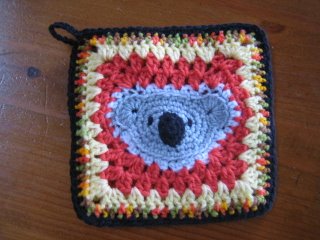
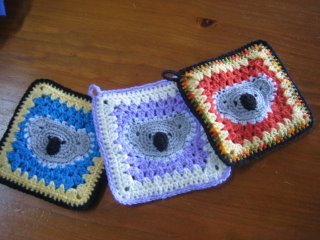
 These I backed with a basic granny pattern that I rather like. The colours of this one are reminiscent of indigenous art and the beautiful colours of the outback.
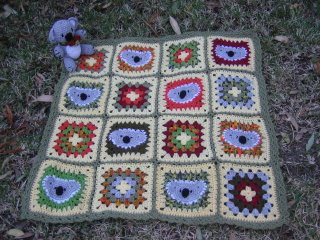 You can also see Buster my avatar koala sitting quite comfortably in the garden.

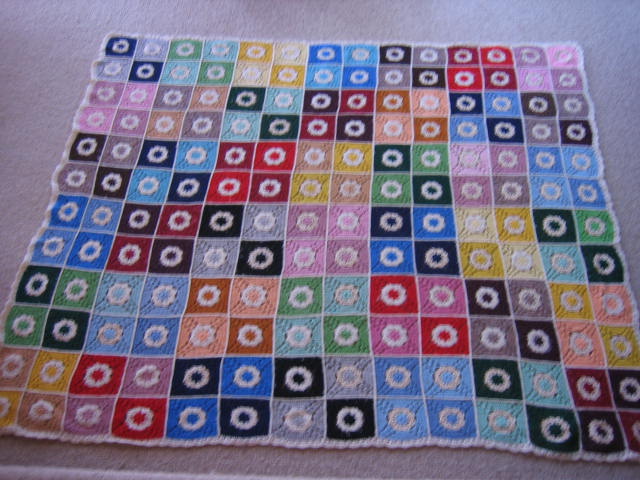
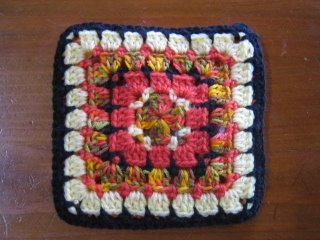
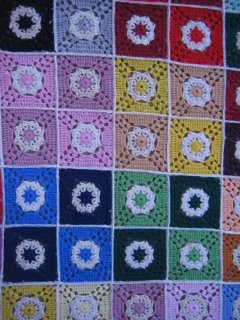 The block is a pretty pattern with a flower type centre and a pattern of shells in the corners. These two are now at least 20 years old and still in pretty good nick.


